DIY bottle cap earrings are a fun and creative way to add a touch of personality to your look. These earrings are easy to make, affordable, and can be customized to match any style. From vintage vibes to modern chic, the possibilities are endless!
Whether you’re a seasoned crafter or just starting out, making bottle cap earrings is a rewarding experience. You can use recycled materials, explore different designs, and experiment with colors and textures to create truly unique pieces.
DIY Bottle Cap Earrings
Bottle cap earrings have become a popular and trendy DIY craft, transforming discarded bottle caps into unique and stylish accessories. While the origins of bottle cap jewelry are unclear, its popularity has surged in recent years, driven by the desire for personalized and eco-friendly fashion.Bottle cap earrings offer a fun and accessible way to express creativity and individuality.
They allow individuals to repurpose everyday materials, giving new life to discarded items. The craft also provides a platform for experimentation with various colors, patterns, and designs, enabling the creation of truly one-of-a-kind pieces.
DIY bottle cap earrings are a fun and easy way to add a touch of personality to your look. I’ve been making them for years, and they’re always a conversation starter. If you’re looking for a more ambitious project, check out this how to make a bolster pillow tutorial.
After all, a cozy pillow is the perfect accessory for a relaxing evening spent crafting your next batch of bottle cap earrings!
Reasons for the Popularity of Bottle Cap Earrings
People enjoy making bottle cap earrings for a variety of reasons. Here are some of the most common:
- Affordability:Bottle caps are readily available and often free, making them a budget-friendly crafting material.
- Sustainability:Upcycling bottle caps into earrings reduces waste and promotes a more sustainable approach to fashion.
- Creativity and Personalization:Bottle caps offer a blank canvas for artistic expression, allowing individuals to create unique and personalized pieces that reflect their style.
- Easy to Make:The process of transforming bottle caps into earrings is relatively simple, making it a beginner-friendly craft.
- Versatility:Bottle caps can be decorated in countless ways, using paints, fabric, embellishments, and other materials to create earrings that suit various styles and occasions.
Materials and Tools
Crafting bottle cap earrings is a fun and creative way to recycle and upcycle materials, turning discarded bottle caps into stylish accessories. You’ll need a few basic supplies and tools to get started, and with a little creativity, you can create unique and personalized earrings.
Bottle Caps
Bottle caps are the foundation of these earrings. Here’s a rundown of the different types of bottle caps that can be used:
- Metal Bottle Caps:These are the most common type of bottle cap, made from aluminum or steel. They come in various colors and sizes, making them versatile for different designs. You can find them in various shapes, such as round, square, or even oval.
I’ve been on a DIY kick lately, and making bottle cap earrings has become my new obsession! It’s so fun to upcycle old bottle caps and turn them into unique and stylish accessories. I’m inspired by the creativity of designers like Aurora James, who was recently featured in an interview on InStyle about her sustainable fashion brand.
Her innovative designs are a reminder that even small DIY projects can have a big impact on our style and the environment. Now, back to those bottle caps – I’m already planning my next batch of colorful earrings!
- Plastic Bottle Caps:While less common, plastic bottle caps can be used for earrings, especially for lighter designs. They’re typically made from polyethylene terephthalate (PET), a lightweight and durable plastic. You can find them in various colors and sizes, similar to metal bottle caps.
- Vintage Bottle Caps:These are older bottle caps that can add a unique and nostalgic touch to your earrings. They often have intricate designs or branding, making them perfect for a vintage aesthetic.
Essential Tools
The following tools are essential for crafting bottle cap earrings:
- Scissors:For cutting materials like fabric, leather, or felt for embellishing the bottle caps.
- Pliers:For bending or shaping the bottle caps, as well as for attaching earring hooks.
- Wire Cutters:For cutting jewelry wire or other metal wires used in earring construction.
- Earrings Hooks:The essential component that allows you to wear the earrings. They come in various sizes, shapes, and materials, such as metal, acrylic, or wood.
- Jump Rings:Small, circular metal rings used to connect the earring hooks to the bottle caps. They come in various sizes and finishes.
- Glue Gun:A hot glue gun is helpful for attaching embellishments to the bottle caps or securing jump rings. You can use hot glue sticks in different colors to add a decorative touch.
- Fabric or Leather:For creating decorative elements like flowers, leaves, or geometric patterns on the bottle caps.
- Paint:Acrylic paints are a great option for adding color and designs to the bottle caps. You can use different colors and techniques to create unique patterns.
Design Ideas and Inspiration
Bottle cap earrings are a versatile and fun way to express your creativity. You can create a wide variety of designs, from simple and elegant to bold and statement-making. With a little imagination, you can transform these humble materials into eye-catching accessories.The possibilities for design are endless, allowing you to incorporate your unique style and preferences.
This section will explore various ideas and inspirations to help you create stunning bottle cap earrings.
Color and Pattern Combinations
Color and pattern are essential elements in creating unique and eye-catching designs. You can experiment with various colors, patterns, and textures to achieve the desired aesthetic.Here are some ideas for incorporating color and pattern into your bottle cap earring designs:
- Solid Colors:Choose a single color for a minimalist look, or combine two or three colors for a bolder statement. You can use acrylic paint, nail polish, or even fabric scraps to create a colorful base.
- Patterns:Incorporate patterns into your designs using stencils, stamps, or freehand painting. Geometric patterns, floral motifs, and abstract designs are all popular choices.
- Textures:Add texture to your earrings using various materials like glitter, sand, or even textured fabric. You can also create unique textures by layering different colors and patterns.
Thematic Designs
You can create themed bottle cap earrings for various occasions or personal interests. This allows you to express your personality and interests through your accessories.Here are some ideas for thematic designs:
- Seasonal:Create earrings for different seasons using colors and patterns that represent each season. For example, use bright colors and floral patterns for spring, warm tones and autumn leaves for fall, and wintery blues and whites for winter.
- Holidays:Design earrings for specific holidays like Christmas, Halloween, or Valentine’s Day. Use festive colors and symbols to create festive earrings.
- Hobbies and Interests:Express your passions through your earrings by incorporating designs related to your hobbies and interests. For example, you can create music-themed earrings with notes and instruments, or nature-inspired earrings with leaves, flowers, and animals.
Unique and Creative Designs
Beyond color, pattern, and theme, you can explore unique and creative designs to make your bottle cap earrings stand out.Here are some ideas for unique and creative designs:
- Mixed Media:Combine different materials like fabric, beads, and charms with bottle caps to create mixed media earrings. This allows for endless possibilities and unique textures.
- Layered Designs:Create layered designs by attaching multiple bottle caps together, or by adding layers of different materials on top of the bottle cap. This creates depth and dimension.
- Asymmetrical Designs:Break away from traditional symmetrical designs and create earrings with asymmetrical shapes and patterns. This adds a touch of whimsy and uniqueness.
Step-by-Step Guide to Making Bottle Cap Earrings: Diy Bottle Cap Earrings
This guide will walk you through the process of making bottle cap earrings from start to finish, covering everything from cleaning and preparing the bottle caps to attaching findings and earring hooks. You’ll also learn some tips and tricks for decorating and personalizing your earrings.
Cleaning and Preparing Bottle Caps, Diy bottle cap earrings
Before you can start decorating, you need to clean and prepare the bottle caps. This will ensure that your earrings are clean and ready to be decorated.
- Wash the bottle caps with soap and water.This will remove any dirt, grime, or residue that may be on the bottle caps.
- Dry the bottle caps thoroughly.This will prevent rust or corrosion from forming.
- If necessary, use a scouring pad or steel wool to remove any stubborn stains.Be careful not to scratch the surface of the bottle caps.
- Apply a layer of sealant or varnish to the bottle caps.This will protect the bottle caps from scratches and wear.
Attaching Findings and Earring Hooks
Once the bottle caps are clean and dry, you can attach the findings and earring hooks.
- Choose your findings and earring hooks.There are many different types of findings and earring hooks available, so choose the ones that best suit your design.
- Use a strong adhesive or epoxy to attach the findings to the bottle caps.Be sure to apply the adhesive evenly and allow it to dry completely before proceeding.
- Attach the earring hooks to the findings.This can be done using a jump ring or by simply attaching the hooks directly to the findings.
Decorating and Personalizing Your Earrings
Once the findings and earring hooks are attached, you can start decorating your earrings. There are endless possibilities for decorating bottle cap earrings, so let your creativity run wild!
- Paint the bottle caps with acrylic paint.You can use different colors, patterns, and techniques to create unique designs.
- Use nail polish to add a pop of color or a glittery finish.
- Add embellishments such as rhinestones, beads, or charms.You can glue these embellishments directly to the bottle caps or use a wire or thread to attach them.
- Use decoupage to add images or patterns to the bottle caps.You can use scrapbook paper, fabric, or even photos.
- Create a vintage look by using a patina or antique finish.
- Embellish the bottle caps with fabric scraps or other materials.Use glue or fabric adhesive to secure the materials to the bottle caps.
- Use a craft knife to create intricate designs in the bottle caps.Be careful when using a craft knife and always wear safety goggles.
Techniques and Variations
The beauty of DIY bottle cap earrings lies in their versatility. You can personalize them to match your style and create unique pieces that reflect your personality. Here are some techniques and variations to consider:
Embellishment Techniques
There are various ways to embellish bottle caps, transforming them into stunning earrings.
- Painting:Acrylic paints are ideal for bottle caps due to their quick drying time and vibrant colors. You can create intricate designs, patterns, or even abstract art.
- Decoupage:This technique involves applying patterned paper, fabric, or other materials to the bottle cap using decoupage glue or Mod Podge. This allows for a wide range of textures and patterns.
- Resin:Epoxy resin adds a glossy, durable finish to bottle caps. You can embed various objects like glitter, beads, or dried flowers in the resin for added dimension and visual interest.
- Metal Stamping:Using metal stamps and a hammer, you can create personalized messages, designs, or initials on the bottle cap. This adds a touch of individuality and can be used for special occasions or gifts.
Material Combinations
Combining different materials can create unique and visually appealing earrings.
DIY bottle cap earrings are a fun and quirky way to add a personal touch to your style. If you’re looking to personalize a gift for a friend, you can check out these 3 easy ways to personalize any gift to get some ideas.
You could even make a pair of bottle cap earrings with a special design or message that’s unique to the recipient. It’s a great way to show you put some thought and effort into the gift, and it’s sure to be appreciated.
- Fabric and Bottle Caps:You can wrap fabric around the bottle cap, securing it with glue or thread. This technique allows for a wide range of colors and textures, depending on the fabric used.
- Beads and Bottle Caps:Beads can be glued or strung around the bottle cap, creating a beautiful and eye-catching design. You can use various bead sizes, shapes, and colors to create unique earrings.
- Wire and Bottle Caps:Wire can be used to create intricate designs around the bottle cap, adding a touch of elegance and sophistication. You can use wire to create loops, swirls, or other decorative elements.
Earring Styles and Designs
Experiment with different earring styles and designs to create a unique look.
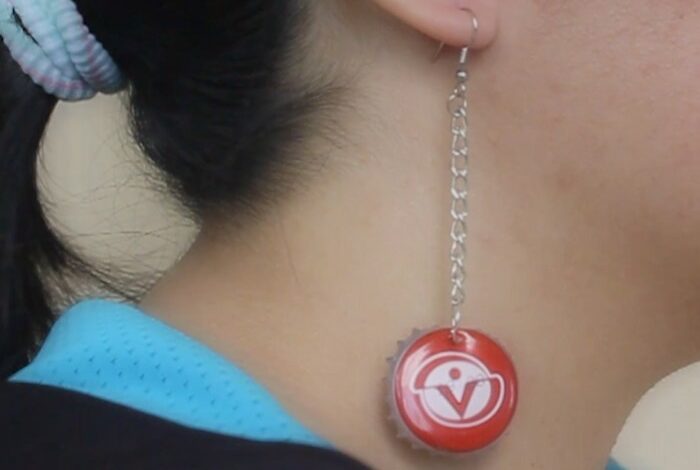
- Dangle Earrings:Attach a chain or wire to the bottle cap and add beads, charms, or other decorative elements to create a beautiful dangling earring.
- Stud Earrings:For a simple and elegant look, attach a stud post to the back of the bottle cap. You can then decorate the front with paint, decoupage, or other embellishments.
- Hoop Earrings:Create a hoop from wire or metal and attach the bottle cap to the hoop using a jump ring. This style allows for a variety of embellishments and design possibilities.
- Asymmetrical Earrings:Create two earrings with different designs or embellishments for a unique and stylish look. For example, one earring could be a simple stud, while the other could be a dangling earring with a more intricate design.
Tips and Tricks for Success

Creating bottle cap earrings can be a fun and rewarding experience, but there are a few tips and tricks that can help you achieve a professional finish and ensure your earrings are durable and long-lasting.
Achieving a Professional Finish
A professional finish is all about attention to detail and careful execution. Here are some tips to help you achieve that polished look:
- Clean your bottle caps thoroughly.Before you start working with your bottle caps, make sure they are free of any dirt, grime, or residue. You can use a mild soap and water or a cleaning solution specifically designed for metal.
- Use a smooth, even coat of paint.If you are painting your bottle caps, use a high-quality acrylic paint and apply it in thin, even coats. Allow each coat to dry completely before applying the next.
- Protect your paint with a sealant.Once your paint is dry, apply a sealant to protect it from scratches and wear. A clear acrylic sealant is a good choice.
- Use a high-quality adhesive.When attaching your bottle caps to the earring findings, use a strong adhesive that is designed for metal. E6000 or similar adhesives are commonly used for this purpose.
- Securely attach your earring findings.Ensure that the earring findings are securely attached to the bottle caps. Allow the adhesive to dry completely before wearing the earrings.
Troubleshooting Common Issues
Here are some common issues you might encounter when making bottle cap earrings and how to troubleshoot them:
- Paint not adhering properly.This could be due to a dirty surface or using the wrong type of paint. Clean the bottle caps thoroughly and use a high-quality acrylic paint.
- Paint chipping or peeling.This could be due to not allowing the paint to dry completely or not using a sealant. Allow the paint to dry completely and apply a sealant to protect it.
- Earrings falling apart.This could be due to using a weak adhesive or not attaching the earring findings securely. Use a strong adhesive designed for metal and make sure the earring findings are firmly attached.
Creating Durable and Long-Lasting Earrings
To ensure your earrings last a long time, consider these tips:
- Choose high-quality materials.Use high-quality bottle caps, paint, sealant, and earring findings.
- Avoid harsh chemicals.Do not expose your earrings to harsh chemicals, such as perfumes or hairspray.
- Store your earrings properly.When not wearing your earrings, store them in a dry, dust-free environment.
Creative Applications and Projects

Bottle caps are a versatile material that can be used for much more than just earrings. Their unique shape and texture lend themselves to a wide range of creative projects, from jewelry to home decor to upcycled crafts.
Exploring Bottle Caps Beyond Earrings
Bottle caps can be incorporated into various jewelry designs beyond earrings.
- Necklaces:Create statement necklaces by stringing bottle caps together, using them as pendants, or incorporating them into beaded designs.
- Bracelets:Bottle caps can be used as charms on bracelets, creating unique and personalized pieces.
- Rings:Bottle caps can be fashioned into rings by cutting them into desired shapes and attaching them to ring bases.
Crafting with Bottle Caps: Home Decor and Upcycling
The versatility of bottle caps extends beyond jewelry making, allowing you to create unique and decorative items for your home.
- Wall Art:Create eye-catching wall art by arranging bottle caps in patterns, designs, or even forming mosaics.
- Coasters:Protect your surfaces with bottle cap coasters, adding a touch of personality to your home decor.
- Magnets:Transform bottle caps into decorative magnets by attaching magnets to the back, perfect for holding notes or adding a whimsical touch to your refrigerator.
Upcycling Bottle Caps: A Sustainable Approach
Bottle caps are a readily available material, often discarded as waste. Upcycling them into creative projects promotes sustainability and reduces waste.
- Keychains:Create personalized keychains by attaching bottle caps to key rings and adding embellishments.
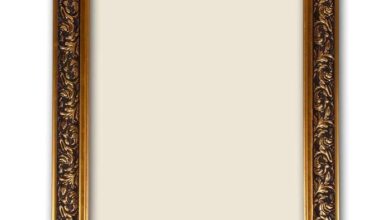
- Mirrors:Give old mirrors a new lease on life by framing them with bottle caps, adding a unique and rustic touch.
- Garden Decor:Use bottle caps to create whimsical garden ornaments, such as wind chimes or decorative stakes.