20 Amazing DIY Wall Art Ideas – Tired of the same old bland walls? Want to inject some personality and creativity into your home? DIY wall art is the perfect solution! It’s not just about adding a splash of color; it’s about expressing yourself, transforming your space, and creating a haven that truly reflects your unique style.
With a little imagination and a few simple materials, you can create stunning wall art that will be the envy of your friends and family.
From nature-inspired designs to geometric patterns and upcycled creations, the possibilities are endless. Whether you’re a seasoned artist or a complete beginner, this guide will walk you through a wide range of DIY wall art ideas, each with step-by-step instructions and inspiring visuals.
Get ready to unleash your inner artist and transform your walls into a captivating reflection of your personality!
Nature-Inspired Wall Art

Nature provides an abundance of materials that can be transformed into beautiful and unique wall art. Incorporating natural elements like dried flowers, leaves, and branches adds a touch of organic beauty and a connection to the outdoors to your home decor.
Dried Flowers and Pressed Leaves in Frames
Dried flowers and pressed leaves offer a delicate and timeless way to bring the beauty of nature indoors. They can be arranged in a variety of ways within a frame, creating a stunning piece of wall art.
- Choose a Frame:Select a frame that complements the colors and textures of your dried flowers or pressed leaves. Consider frames with a simple design to let the natural elements take center stage.
- Prepare the Flowers and Leaves:If you haven’t already, dry your flowers or press your leaves. You can dry flowers by hanging them upside down in a dark, dry place for a few weeks. For pressing, place leaves between two sheets of absorbent paper and weigh them down with heavy books for several days.
- Arrange the Elements:Arrange your dried flowers and pressed leaves within the frame to create a visually appealing composition. Experiment with different arrangements and colors to achieve the desired effect.
- Secure the Elements:Once you’re satisfied with the arrangement, secure the flowers and leaves in place with a thin layer of glue or a few drops of acrylic medium. This will help prevent them from shifting and becoming damaged over time.
- Add a Background:For a more dramatic effect, consider adding a background to your frame. You can use a piece of fabric, wallpaper, or even a piece of natural bark.
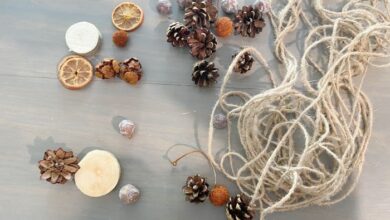
Twigs and Twine Wall Hanging
A wall hanging made with twigs and twine adds a rustic and organic touch to any room. The natural elements create a sense of warmth and tranquility.
- Gather Materials:Collect twigs of varying lengths and thicknesses from your yard or a local park. Choose twigs with interesting shapes and textures. You’ll also need twine or yarn, scissors, and a piece of wood or cardboard for the base of your hanging.
- Create the Base:Cut a piece of wood or cardboard to the desired size for your wall hanging. You can use a circular, rectangular, or any other shape you like.
- Arrange the Twigs:Arrange the twigs on the base, creating a visually appealing pattern. You can create a simple design or experiment with more complex arrangements.
- Secure the Twigs:Tie the twigs to the base using twine or yarn. Wrap the twine around the twigs and the base, securing them in place.
- Add a Hanging Loop:Tie a loop of twine to the top of the base to create a hanging point for your wall hanging.
Shadow Box with Natural Elements
A shadow box offers a unique way to display natural elements like shells, stones, and driftwood. It creates a three-dimensional display that adds depth and texture to your wall art.
- Choose a Shadow Box:Select a shadow box that is the appropriate size for your natural elements. Consider the depth of the box to ensure your elements can be displayed effectively.
- Gather Natural Elements:Collect shells, stones, driftwood, or other natural elements that you’d like to display. Choose items with interesting shapes, textures, and colors.
- Arrange the Elements:Arrange your natural elements within the shadow box, creating a visually appealing composition. You can create a simple design or experiment with more complex arrangements.
- Secure the Elements:Use a hot glue gun or a strong adhesive to secure the elements in place within the shadow box. Make sure the adhesive is strong enough to hold the elements securely.
- Add a Background:For a more dramatic effect, consider adding a background to your shadow box. You can use a piece of fabric, wallpaper, or even a piece of natural bark.
Geometric and Abstract Wall Art
Geometric and abstract wall art offers a unique and modern way to add personality and visual interest to any space. The use of shapes, colors, and patterns creates a dynamic and captivating aesthetic that can transform a blank wall into a focal point.
Geometric Shapes and Colors in Wall Art
Geometric shapes and colors play a crucial role in creating visual interest in wall art.
- Geometric Shapes:Basic shapes like squares, circles, triangles, and rectangles form the foundation of geometric art. They can be used individually or combined to create complex patterns. The arrangement and size of these shapes influence the overall composition and visual impact of the artwork.
- Colors:Color choices are equally important in geometric wall art. Contrasting colors, like black and white, create a bold and dramatic effect. Complementary colors, such as blue and orange, create a vibrant and eye-catching look. Monochromatic color schemes, using variations of a single hue, can create a sense of tranquility and sophistication.
Creating a Geometric Wall Mural
Creating a geometric wall mural with painter’s tape and acrylic paint is a fun and accessible DIY project.
- Plan the Design:Choose a geometric pattern, such as a grid, stripes, or repeating shapes. Consider the size and layout of the mural in relation to the wall space.
- Prepare the Wall:Clean and smooth the wall surface to ensure the paint adheres properly. Use painter’s tape to Artikel the design, creating clean lines and precise shapes.
- Apply the Paint:Use acrylic paint in your chosen colors to fill in the sections of the mural. Allow each layer of paint to dry completely before applying the next.
- Remove the Tape:Once the paint is dry, carefully remove the painter’s tape, revealing the geometric pattern.
Creating Abstract Art with Textures
Abstract art offers endless possibilities for creativity and expression.
- Canvas Preparation:Begin with a blank canvas and choose your desired colors. Apply a base coat of paint, allowing it to dry completely.
- Experiment with Textures:Explore different textures to add depth and dimension to your abstract art. Use sponges, brushes, rags, or even natural objects like leaves or twigs to create interesting patterns and effects.
- Layer and Blend:Apply layers of paint, blending and overlapping colors to create visual interest and depth. Use a palette knife or other tools to manipulate the paint and create unique textures.
- Embrace Imperfection:Abstract art is about letting go of perfection and embracing the unexpected. Don’t be afraid to experiment and make mistakes, as they can often lead to beautiful and unique results.
Upcycled Wall Art

Upcycled wall art is a fantastic way to add personality and creativity to your home while minimizing waste. By repurposing everyday items, you can create unique and stylish pieces that reflect your personal style and environmental consciousness.
Examples of Upcycled Materials for Wall Art
Upcycling materials can be as simple as using old magazines or newspapers to create intricate patterns, or as complex as transforming discarded wood into a unique wall sculpture. Here are some examples of materials that can be used for upcycled wall art:
- Old magazines and newspapers:These can be used to create collages, decoupage, or even abstract art.
- Discarded wood:Repurposed wood can be used to create shelves, frames, or even abstract sculptures.
- Broken plates and tiles:These can be used to create mosaics or unique wall decorations.
- Plastic bottles and containers:These can be cut, shaped, and painted to create interesting and colorful wall art.
- Old clothing and fabrics:These can be used to create textile art, tapestries, or even wall hangings.
- Wine corks:These can be used to create unique patterns or even 3D wall art.
- Buttons and beads:These can be used to create decorative wall art or even embellish other upcycled projects.
- Junk mail and cardboard:These can be used to create interesting textures and patterns in wall art.
- Old CDs and DVDs:These can be used to create reflective or mosaic-like wall art.
- Metal scraps:These can be used to create abstract sculptures or even decorative wall hangings.
Creating Wall Art from Old Magazines or Newspapers
Creating wall art from old magazines or newspapers is a simple and versatile project. You can use different techniques, such as cutting, tearing, layering, and gluing, to create unique and interesting designs. Here’s a simple idea:
1. Choose a theme
You can choose a theme based on your interests, such as nature, travel, or abstract art.
2. Select your materials
Gather old magazines and newspapers that fit your theme.
3. Cut or tear the pages
Cut or tear the pages into different shapes and sizes.
4. Arrange the pieces
Experiment with different arrangements until you find a design you like.
5. Glue the pieces
Use a strong adhesive to glue the pieces to a canvas, cardboard, or any other surface you choose.
I’m always looking for ways to add personality to my home, and DIY wall art is a fantastic way to do it. From repurposed materials to creative paint techniques, there are so many options to explore. After a long day of crafting, though, nothing beats a comforting meal like gnocchi and vegetable soup.
The warm flavors and hearty textures are the perfect way to unwind. And then, with a full stomach and a renewed sense of energy, I can get back to creating more amazing DIY wall art!
6. Add finishing touches
You can add paint, glitter, or other embellishments to enhance the design.
Creating a Decorative Wall Clock from Recycled Materials
Creating a decorative wall clock from recycled materials is a fun and eco-friendly project. You can use materials like old vinyl records, wooden pallets, or even cardboard to create the base of your clock.Here’s how to create a clock from a recycled vinyl record:
1. Prepare the vinyl record
Clean the record and remove any labels or stickers.
2. Cut the center
Use a sharp knife or a hole punch to create a hole in the center of the record.
3. Attach the clock mechanism
Secure the clock mechanism to the back of the record using screws or glue.
4. Add the hands
From repurposed materials to bold statement pieces, 20 amazing DIY wall art ideas offer a creative outlet for personalizing your space. If you’re working with square photos, check out 10 ideas for square photos for inspiration on how to showcase them.
These ideas can be incorporated into your DIY wall art, adding a touch of whimsy and individuality to your home decor.
Attach the clock hands to the mechanism.
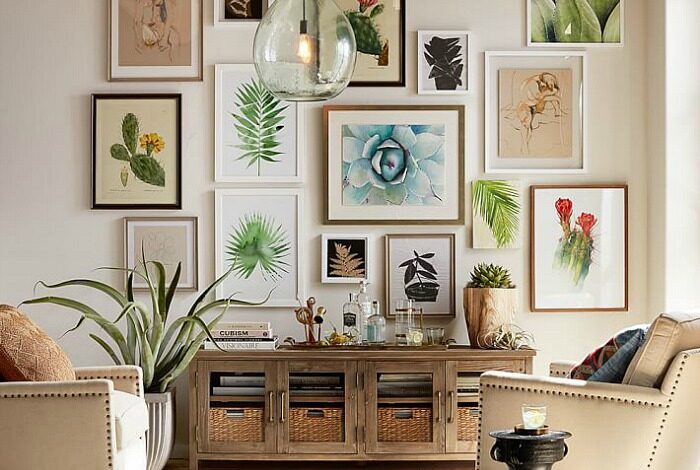
Looking for ways to personalize your space without breaking the bank? 20 amazing DIY wall art ideas can transform any room! You can create a gallery wall of framed prints, hang macrame wall hangings, or even paint your own abstract art.
For a more cohesive look, consider incorporating elements of a sister style comfy cozy aesthetic with soft colors, textured fabrics, and natural materials. Once you’ve got your DIY wall art in place, you’ll be ready to enjoy a space that truly reflects your unique style.
5. Decorate the record
You can paint the record, add glitter, or use decoupage to personalize it.
6. Mount the clock
Attach the clock to the wall using a hook or a nail.
Making a Unique Wall Sculpture from Repurposed Wood
Repurposed wood, such as old pallets, driftwood, or even scraps from construction projects, can be transformed into unique and beautiful wall sculptures.Here are some ideas for creating a wood wall sculpture:
1. Choose your wood
Select wood that has interesting textures, shapes, and colors.
2. Prepare the wood
Clean the wood and remove any loose pieces or debris.
3. Cut and shape the wood
Use a saw, a jigsaw, or a chisel to cut and shape the wood into the desired forms.
4. Assemble the pieces
Use glue, screws, or nails to assemble the pieces of wood into a sculpture.
5. Finish the sculpture
You can paint, stain, or varnish the sculpture to enhance its appearance.
6. Mount the sculpture
Attach the sculpture to the wall using hooks, brackets, or a strong adhesive.
Painted Wall Art
Painting your own wall art is a fantastic way to personalize your space and add a unique touch to your décor. With a little creativity and some basic supplies, you can create stunning pieces that reflect your style and interests.
Large-Scale Painting Using Acrylic Paints and a Roller
Large-scale paintings can make a dramatic statement on your walls. Using acrylic paints and a roller allows you to cover a large area quickly and easily.Here are some tips for creating a large-scale painting:
- Choose a large canvas or a section of your wall.Consider the size of the space and the impact you want to create.
- Prepare your surface.Make sure your canvas or wall is clean and smooth. If you are painting on a wall, use painter’s tape to protect surrounding areas.
- Use acrylic paints.Acrylic paints are water-based, quick-drying, and easy to work with. You can find them in a wide range of colors.
- Choose a roller with a long handle.This will make it easier to reach the top of your canvas or wall.
- Apply the paint in even strokes.Start at the top and work your way down. Overlap the strokes slightly to ensure even coverage.
- Experiment with different techniques.You can create different effects by using different roller sizes, textures, and colors.
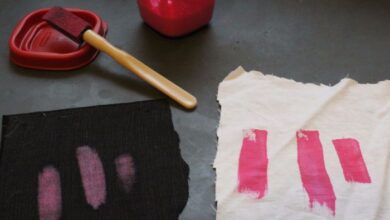
Creating a Watercolor Painting with a Textured Background
Watercolor paintings are known for their delicate beauty and ethereal quality. By adding a textured background, you can create depth and dimension to your artwork.
- Prepare your canvas or paper.You can use watercolor paper or even regular paper. For a textured background, you can use a variety of materials, such as salt, sandpaper, or crumpled paper.
- Apply the texture.Sprinkle salt, rub sandpaper, or crumple paper onto the surface before applying the watercolor paint. The texture will create interesting patterns and effects as the paint dries.
- Apply the watercolor paint.Use a brush to apply the paint in thin washes. Allow the paint to dry completely before removing the texture.
- Experiment with different colors and techniques.You can use multiple colors to create a vibrant painting or use a single color for a more subtle effect.
Creating a Stencil Design Using a Template and Paint
Stencils are a great way to create intricate designs on your walls without needing advanced painting skills. You can find stencils in a variety of shapes and sizes or even create your own.
- Choose a stencil design.There are countless stencil designs available online and in craft stores. Consider the style and theme of your space when choosing a design.
- Prepare your surface.Clean and smooth your wall or canvas. You can use painter’s tape to secure the stencil in place.
- Apply the paint.Use a stencil brush or sponge to apply the paint evenly to the stencil. Avoid pressing too hard, as this can cause the paint to bleed under the stencil.
- Remove the stencil carefully.Once the paint is dry, carefully peel the stencil away from the surface.
Wall Art with Personal Touches: 20 Amazing Diy Wall Art Ideas

Infuse your home with warmth and character by creating wall art that reflects your unique memories and experiences. Whether it’s cherished photos, sentimental mementos, or treasured fabric scraps, there are endless possibilities for turning these personal touches into captivating displays.
Creating a Photo Collage
A photo collage is a wonderful way to showcase a collection of family photos, travel snapshots, or other cherished images. This type of wall art is incredibly versatile, allowing you to experiment with different layouts, sizes, and decorative elements.
- Choose a Theme:Select a theme that ties your photos together, such as a specific vacation, a family milestone, or a shared hobby.
- Gather Your Photos:Collect photos that represent your chosen theme. Experiment with different sizes and shapes to add visual interest.
- Select a Background:Choose a background that complements your photos and the overall theme. You can use a plain canvas, a patterned fabric, or even a piece of wallpaper.
- Arrange Your Photos:Arrange your photos on the background, playing with different layouts and spacing until you achieve a visually pleasing arrangement.
- Add Decorative Elements:Enhance your collage with decorative elements such as ribbons, buttons, or dried flowers. These elements can add color, texture, and a personal touch.
- Secure Your Photos:Use glue or adhesive tape to secure your photos and decorative elements to the background.
- Frame Your Collage:Frame your collage to protect it and enhance its aesthetic appeal. Choose a frame that complements your theme and the overall design of your home.
Creating a Shadow Box
A shadow box is a perfect way to display three-dimensional objects and sentimental items. These items might include ticket stubs, letters, pressed flowers, or other mementos that hold special meaning.
- Choose a Shadow Box:Select a shadow box that is the appropriate size for your items. You can find shadow boxes in various shapes, sizes, and materials.
- Gather Your Items:Collect the items you want to display in your shadow box. Choose items that are meaningful and represent your memories or experiences.
- Arrange Your Items:Arrange your items in the shadow box, playing with different layouts and spacing until you achieve a visually appealing arrangement.
- Secure Your Items:Use glue, adhesive tape, or small pins to secure your items to the back of the shadow box.
- Add Background Material:If desired, add a background material to your shadow box, such as fabric, paper, or a piece of wallpaper. This can help to enhance the visual appeal of your display and create a cohesive look.
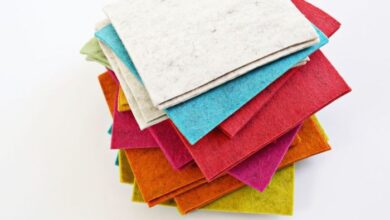
Creating a Wall Hanging with Personalized Fabric Scraps
A wall hanging is a beautiful way to showcase your love of fabric and add a personal touch to your decor. This project is a great way to use up scraps of fabric from other projects, or to create a piece of art that reflects your unique style.
- Choose a Base:Select a base for your wall hanging, such as a piece of canvas, burlap, or a wooden frame.
- Gather Your Fabric Scraps:Collect fabric scraps in various colors, patterns, and textures. Consider using fabrics that have personal significance, such as scraps from clothing or blankets.
- Cut and Arrange Your Fabric:Cut your fabric scraps into different shapes and sizes, and arrange them on the base of your wall hanging. Experiment with different layouts and color combinations until you achieve a visually pleasing design.
- Secure Your Fabric:Use glue, adhesive tape, or fabric glue to secure your fabric scraps to the base of your wall hanging.
- Add Embellishments:If desired, add embellishments to your wall hanging, such as buttons, beads, or embroidery. These elements can add color, texture, and a personal touch.
- Hang Your Wall Hanging:Once your wall hanging is complete, attach a hanger or loop to the back and hang it on your wall.
DIY Wall Art for Different Rooms
Creating DIY wall art is a great way to personalize your home and express your individual style. The beauty of this approach is that you can tailor your art to complement the specific aesthetic of each room, creating a cohesive and visually appealing environment.
Let’s explore some ideas for crafting wall art that perfectly suits different room styles.
Minimalist Wall Art for a Modern Living Room, 20 amazing diy wall art ideas
A modern living room often features clean lines, neutral colors, and a focus on functionality. To create minimalist wall art for this space, consider the following:
- Geometric Shapes:Simple geometric shapes like circles, squares, and triangles can be arranged in a visually appealing pattern on a canvas or wooden board. You can use paint, markers, or even tape to create these shapes.
- Black and White Photography:Choose a striking black and white photograph that captures a minimalist theme. Frame it with a simple, sleek frame to maintain the clean aesthetic of the room.
- Textual Art:A single word or phrase that resonates with you can be displayed in a minimalist font on a canvas or wooden board. Use a contrasting color for the text to make it stand out.
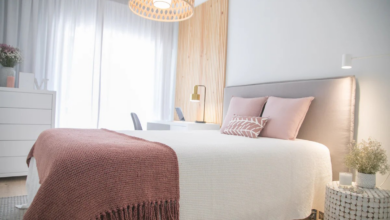
Bohemian Wall Art for a Bedroom
A bohemian bedroom typically embraces a free-spirited and eclectic style, often featuring vibrant colors, natural textures, and global influences. To create bohemian wall art, consider these ideas:
- Macrame Wall Hangings:Macrame is a popular bohemian craft that involves knotting cords or yarn to create intricate patterns. A macrame wall hanging can add a touch of texture and artistry to your bedroom.
- Dreamcatchers:Dreamcatchers, with their circular shape and intricate beading, are a classic bohemian element. They can be hung above the bed or placed on a wall to add a touch of magic and whimsy.
- Natural Elements:Incorporate natural elements like dried flowers, branches, or feathers into your wall art. You can create a collage or simply frame these elements for a rustic and organic look.
Whimsical Wall Art for a Child’s Room
A child’s room should be a space filled with imagination and wonder. Whimsical wall art can help create a fun and stimulating environment. Consider these ideas:
- Animal Silhouettes:Create silhouette cutouts of animals from cardboard or felt. Paint them in bright colors and arrange them on a wall to create a whimsical animal parade.
- Rainbow Art:A rainbow is a classic symbol of childhood joy. You can paint a rainbow on a canvas, create a rainbow mobile, or even use colored paper strips to create a rainbow garland.
- Cloud Shapes:Use cotton balls, felt, or even paper to create fluffy cloud shapes. Attach them to a wall with tape or pins for a whimsical and dreamy touch.
Tips for Creating DIY Wall Art
Creating your own wall art is a fantastic way to personalize your space and express your creativity. Whether you’re a seasoned artist or a beginner, there are a few key tips that can help you create stunning DIY masterpieces.
Choosing the Right Materials and Tools
The materials and tools you choose will depend on the type of wall art you’re making. For example, if you’re creating a painting, you’ll need paintbrushes, canvases, and paint. If you’re working with wood, you’ll need saws, sandpaper, and wood glue.
Here are some tips for selecting the right materials:
- Consider your budget.There are many affordable materials you can use for DIY wall art, such as recycled materials, fabric scraps, and found objects.
- Think about the style of your home.Choose materials that complement the overall aesthetic of your space.
- Experiment with different materials.Don’t be afraid to try new things. You might be surprised at what you can create.
It’s also important to have the right tools for the job. Invest in quality tools that will make your projects easier and more enjoyable.
Planning and Sketching Your Ideas
Before you start creating, it’s essential to plan your design. Sketching your ideas can help you visualize your finished piece and make adjustments before you commit to anything permanent.Here are some tips for planning and sketching:
- Gather inspiration.Look at magazines, websites, and art galleries for ideas.
- Sketch out your ideas.Don’t be afraid to experiment with different shapes, colors, and textures.
- Consider the size and scale of your piece.You don’t want your wall art to be too big or too small for the space.
Achieving a Professional Finish
With a little attention to detail, you can create DIY wall art that looks like it came from a gallery. Here are some tips for achieving a professional finish:
- Use a smooth surface.If you’re working with wood, make sure to sand it down to a smooth finish.
- Use high-quality paint.This will ensure that your colors are vibrant and that your paint dries evenly.
- Take your time.Don’t rush the process. Allow each layer of paint to dry completely before applying the next.
- Protect your finished piece.If you’re working with wood, you can seal it with a clear varnish or polyurethane.
Displaying and Hanging Your Finished Wall Art
Once your DIY wall art is complete, it’s time to display it proudly. Here are some tips for hanging your pieces:
- Choose the right location.Consider the size and shape of your piece, as well as the lighting in the room.
- Use the right hanging hardware.Make sure to use hooks or nails that are strong enough to support the weight of your piece.
- Hang your pieces at eye level.This will ensure that they are easy to see and appreciate.
Inspiration for DIY Wall Art
Inspiration is the driving force behind any creative endeavor, and DIY wall art is no exception. Whether you’re a seasoned artist or a beginner, finding inspiration can spark your imagination and help you create unique and personalized pieces. Exploring different sources of inspiration can help you discover new techniques, materials, and styles.
Websites and Blogs
Websites and blogs dedicated to DIY projects, home décor, and art offer a wealth of inspiration. These platforms often feature step-by-step tutorials, project ideas, and galleries of stunning DIY wall art.
- Pinterest:Pinterest is a visual search engine that allows you to browse and save images. You can find countless DIY wall art ideas by searching for s like “DIY wall art,” “upcycled wall art,” or “nature-inspired wall art.”
- Etsy:Etsy is an online marketplace for handmade goods, including art supplies and finished art pieces. Browsing Etsy can provide inspiration for unique and creative DIY projects.
- DIY Network:DIY Network offers a variety of resources for DIY enthusiasts, including articles, videos, and project plans for creating DIY wall art.
Social Media
Social media platforms like Instagram and TikTok are brimming with creative individuals sharing their DIY projects. Following artists, crafters, and home décor enthusiasts can expose you to a diverse range of styles and techniques.
- Instagram:Search for hashtags like #DIYwallart, #upcycledart, or #artinspiration to discover a world of creative projects.
- TikTok:TikTok offers short videos that showcase quick and easy DIY projects, including wall art ideas. Search for s like “DIY wall art” or “easy art projects” to find inspiration.